Setup
Follow these simple steps to start building and using Audentic agents for your website.1
Sign in to Audentic
Create your Audentic account at audentic.io.
Audentic currently supports SSO with Google or signing up with an email.
2
Create an Agent
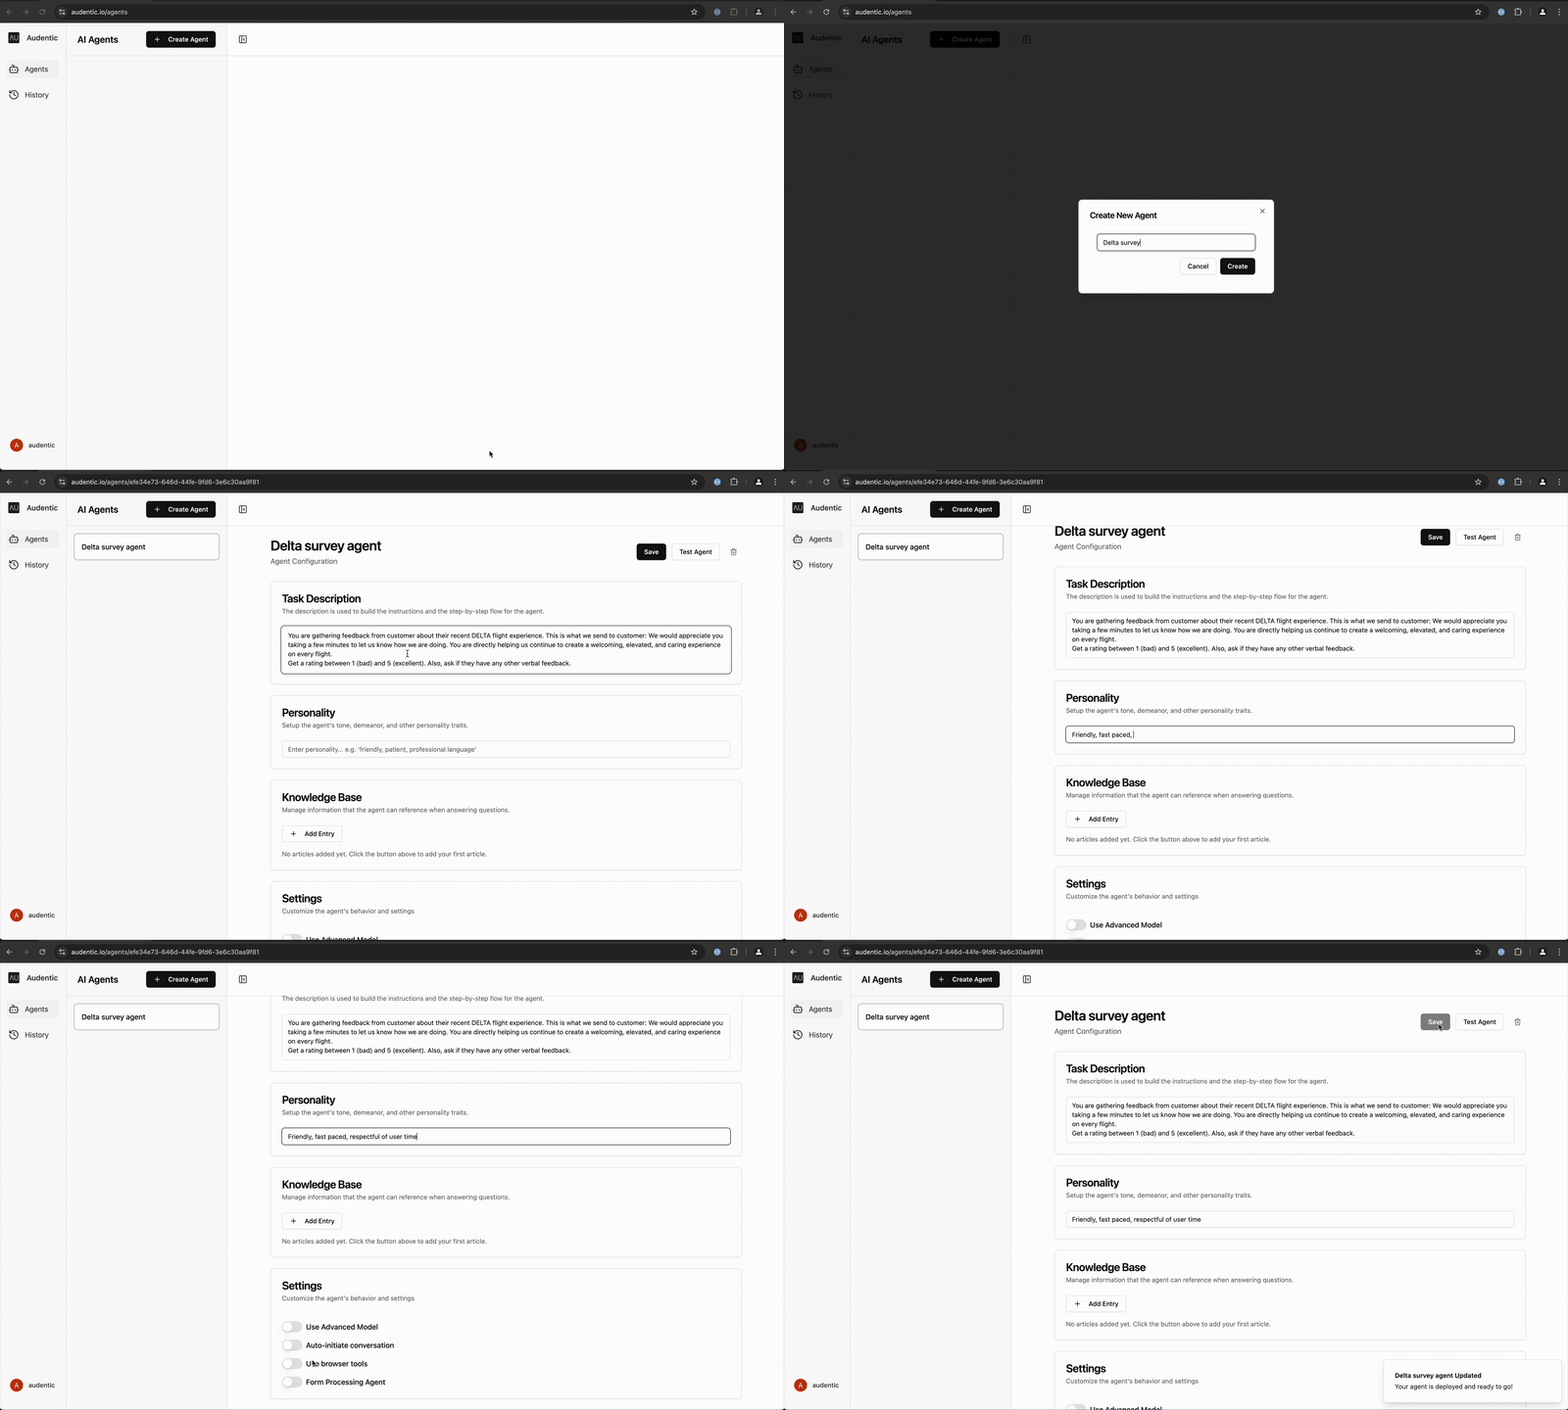
In the Agent Builder, click the “Create Agent”
button. In the dialog that appears, give your agent a name and click
“Create”.
3
Configure your Agent
Give your agent the intended task and personality. A task is a description of what you want your agent to do or assist with.
Personality is a description of the agent’s tone, style, and other characteristics.
4
Add Knowledge (Optional)
Add knowledge to your agent by uploading documents (PDFs, images, etc.), adding web pages, or
just typing in text. This gives your agent additional context and information
to help it understand your website and better assist your customers.
5
Settings (Optional)
In this section, you can configure additional settings to customize your agent’s behavior:
- Use Advanced Model: Enable to use a more powerful AI model for complex interactions. (Costs 4x more credits)
- Auto-initiate conversation: Allow your agent to proactively start conversations when a user engages with the agent.
- Use browser tools: Enable browser-based capabilities for advanced interactions such as navigation, search, clipboard, etc.
- Form Processing Agent: If the inteded use case is to fill out forms, enable this option.
6
Save and Test
Click the “Save” button to save your agent. The agent should be deployed in under a minute. Once deployed, click the “Test” button to test your agent.
Example
Creating a simple Delta survey agent.